

How to Choose Street Outdoor Lights in 2026?
Choosing a Street Outdoor Light in 2026 means balancing clear visibility with comfort, durability, and energy use. A bright fixture is not automatically a better one. Glare can wash out a wet road, while poor beam control can leave a dark patch beside a crossing. Small details matter: mounting height, lens design, pole spacing, and the color of nearby surfaces all affect what people see.
Lighting researcher Dr. Mariana Figueiro’s human-centered work offers a useful perspective. A fair paraphrase of that approach is: “Light should support people without overpowering the place.” This is an editorial paraphrase, not a verified verbatim quotation. That distinction matters; trustworthy lighting advice should separate documented evidence from convenient slogans.
This guide explores how to compare outdoor street fixtures, assess optical performance, and match light output to real site conditions. It also considers controls, maintenance access, weather exposure, and the details often missed during a quick product comparison. Look closely. A neat specification sheet cannot show how light will feel at eye level on a rainy evening. Nor can one fixture solve every street’s needs. Site testing and professional review remain important, even when the product appears straightforward. And sometimes the first choice is wrong. A careful plan leaves room to measure, reflect, and adjust.
Assess the Street’s Layout, Users, and Lighting Needs
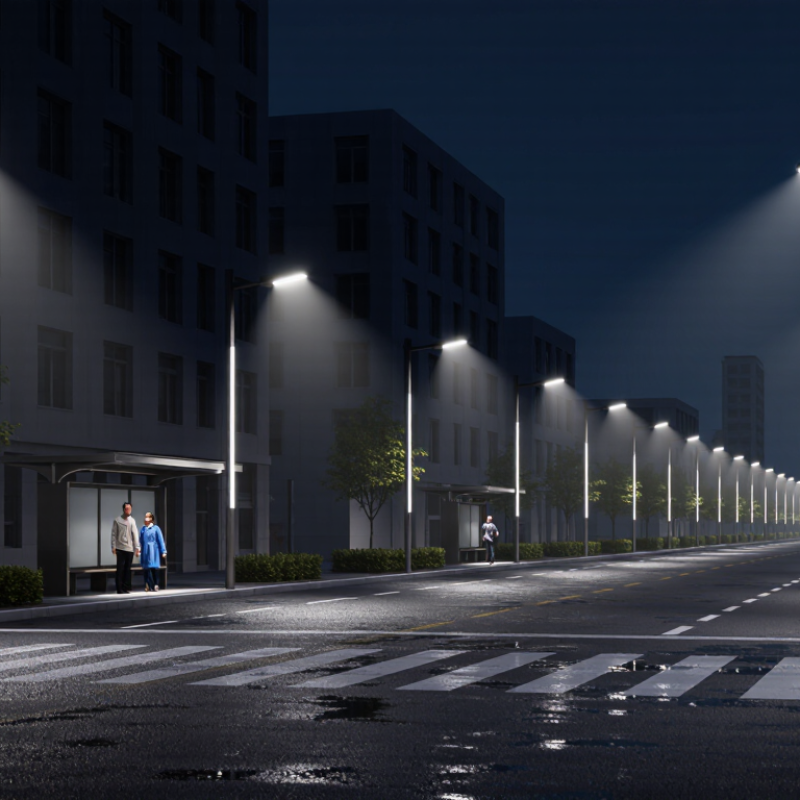
Before choosing street lights, walk the route after dark and study its layout. A broad road, narrow lane, sharp bend, and busy crossing each need different coverage. Note trees, parked vehicles, building entrances, and places where shadows gather. Small details matter. Mark lamp locations and measure approximate spacing; a simple street map can reveal dark gaps that are easy to overlook from a car.
Consider who uses the street, and when. Pedestrians may need clear views of curbs and faces, while cyclists need consistent light along the riding path. Drivers need enough visibility to notice crossings without harsh glare. Check where people wait, turn, or gather, such as bus stops and school entrances. Observe these spots at different hours. A quiet street at midnight may be crowded at dusk.
Then match lighting to actual needs, not just road width. Look for even coverage between poles and avoid bright pools beside deep shadows. Review fixture aiming, mounting height, and spacing against a photometric plan, then verify the result on site. Local requirements also matter. A tidy plan can still miss a tree canopy or a newly added sign; revise it after a night check. Keep notes on glare, dark patches, and user feedback before finalizing the layout.
How to Choose Street Outdoor Lights in 2026?
Assess the street’s layout, users, and lighting needs.
Representative maintained average illuminance planning values are shown in lux. Choose levels based on traffic, pedestrian activity, conflict points, and local lighting standards; confirm each design with a site-specific photometric assessment.
Compare Luminaire Types, Light Distribution, and Color Quality
How to Choose Street Outdoor Lights in 2026?
Choosing a street luminaire starts with the place it must serve. A roadway, sidewalk, and small plaza need different optics. Full-cutoff fixtures can limit light above the horizon, while asymmetric optics direct more light along a road. Decorative post-top luminaires may suit a pedestrian area, but their appearance alone says little about visibility. Check the intended mounting height and spacing before comparing wattage.
Light distribution affects both useful coverage and dark gaps. Review photometric plans, then inspect a sample layout at night if possible. A bright patch beneath each pole is not enough; look for even illumination across the pavement and curb. Color quality matters, too. A moderate color temperature can keep a street comfortable, while good color rendering helps people distinguish clothing and objects. Yet a high CRI number does not guarantee pleasant light. Consistency between fixtures matters. A mock-up can look convincing, then feel harsh on a wet road.
Tips: Compare beam patterns, glare control, and color data together. Ask for measured photometric files, not just a lumen figure. Notice how the light looks on actual pavement. Small differences in mounting angle can change the result. Don’t over-trust a single test; site conditions are rarely perfect.
How to Choose Street Outdoor Lights in 2026? - Compare Luminaire Types, Light Distribution, and Color Quality
| Luminaire Type | Typical Light Distribution | Best-Fit Locations | Color Quality to Consider | Main Advantages | Selection Checks |
|---|---|---|---|---|---|
| Roadway / cobrahead LED | IES Type II or III is commonly used for roads; Type II suits narrower layouts, while Type III can cover broader road areas. | Local streets, collector roads, and many urban roadways. | About 3000–4000 K is a common specification range. CRI 70 or higher is often used for general road lighting; consider higher CRI where color identification is important. | Designed for roadway mounting and controlled forward distribution; broad availability of optical options. | Check pole spacing, mounting height, road width, glare, uniformity, and the project’s required illuminance or luminance criteria. |
| Area or floodlight | IES Type III or IV can direct light toward an area from an edge; Type V provides a more symmetrical distribution around the pole. | Intersections, parking areas, transit zones, and open paved spaces. | Choose a consistent CCT for the site, commonly 3000–4000 K. Higher CRI can help with color recognition, but does not replace adequate illumination and uniformity. | Flexible aiming and distribution options for irregular or wide areas. | Review aiming angles, spill light at property boundaries, upward light, glare, and whether the optic matches the site geometry. |
| Post-top / pedestrian-area luminaire | Often uses a Type V or other symmetric distribution; asymmetric optics are available for paths and edges. | Plazas, parks, pedestrian streets, and low-speed public spaces. | Warm-white options around 2700–3000 K can suit pedestrian settings; verify color consistency and CRI for the intended use. | Can provide a human-scale appearance and even light around a pole when correctly spaced. | Check pedestrian-level uniformity, shielding, mounting height, glare, and whether decorative elements reduce optical performance. |
| Bollard light | Typically directs light downward or asymmetrically across a path rather than distributing it like a roadway optic. | Walkways, park paths, and short pedestrian routes. | Warm-white light is often preferred for comfort; select CRI according to the need to distinguish faces, surfaces, or objects. | Provides low-level wayfinding light and can reduce the need for tall poles in some pedestrian areas. | Check spacing, trip hazards, shielding, vandal resistance, and whether the lighting plan avoids bright spots and dark gaps. |
| High-mast luminaire | Usually uses area-oriented optics, including symmetrical Type V distributions or selected asymmetric distributions. | Large intersections, interchanges, ports, and expansive transport or parking areas. | Use a consistent CCT across the installation; select CRI based on visibility and identification needs rather than CCT alone. | Can illuminate a large area from a small number of tall structures. | Assess glare, aiming, maintenance access, wind and structural requirements, and photometric performance at ground level. |
| Tunnel or underpass luminaire | Uses purpose-designed longitudinal or transverse distributions; the required pattern depends on tunnel geometry and lighting zones. | Road tunnels, underpasses, and enclosed vehicle routes. | Specify consistent color appearance and suitable CRI for visual tasks; account for adaptation between entrance, interior, and exit zones. | Designed for demanding operating conditions and continuous visibility requirements. | Check the applicable tunnel-lighting design criteria, uniformity, glare, environmental rating, maintainability, and control strategy. |
Practical note: IES Type I–V descriptions refer to light-distribution patterns, not luminaire categories. Final selection should be verified with project-specific photometric files and a lighting calculation; local codes and roadway standards take precedence.
Evaluate Energy Efficiency, Controls, and Smart-City Compatibility
In 2026, compare street lights by useful light on the pavement, not wattage alone. Check efficacy, measured in lumens per watt, alongside beam distribution and glare control. A narrow, well-aimed beam can illuminate a crossing without wasting light on windows or tree canopies. Ask for photometric data, then compare it with the actual road layout. Numbers need context.
Controls affect real energy savings. Dimming schedules can lower output during quiet hours, while motion sensors may raise it when people approach. But settings need care: abrupt changes can feel unsettling, and poorly placed sensors may miss cyclists or pedestrians. Test controls on site after dark. A neat simulation is not enough.
For smart-city compatibility, check whether the fixture supports documented communication protocols and can connect with the city’s existing management system. Confirm that operators can adjust schedules, view faults, and export basic performance data without relying on a single supplier’s platform. Also ask how the lights behave during network outages. They should keep a safe, pre-set operating mode. Compatibility claims can sound vague, so request a live demonstration and a clear record of supported functions. Leave room for revision; local conditions rarely match the first plan exactly.
Check Safety, Weather Resistance, and Local Lighting Standards
Street lighting is a safety system, not just a bright pole. NHTSA recorded 42,514 U.S. traffic deaths in 2022; that figure does not isolate lighting, but it underscores the need to assess visibility carefully. Check crossings, driveways, sidewalks, and dark gaps after sunset. Look for glare that obscures pedestrians or signs. Brighter is not always safer. Easy to overlook.
For exposed locations, compare fixture ratings with actual weather conditions. IEC 60529 defines IP65 as dust-tight and protected against water jets; IP66 covers powerful water jets. Neither rating alone guarantees resistance to salt, corrosion, or ultraviolet exposure. Check seals, coatings, fasteners, and the stated operating-temperature range. Then compare photometric plans and mounting heights with locally adopted roadway requirements and ANSI/IES RP-8-22 guidance. Rules vary by road type and jurisdiction. Confirm limits on light trespass and operating hours with the local authority before ordering. I would still inspect the site at night; a tidy plan can miss a troublesome shadow.
Plan Installation, Maintenance, and Long-Term Costs
How to Choose Street Outdoor Lights in 2026?
Plan Installation, Maintenance, and Long-Term Costs
Street lights work best when the installation plan starts with the site, not the fixture catalogue. Walk the road after dark and note driveways, trees, crossings, and dark patches. These details affect pole spacing, mounting height, and glare. Ask a qualified lighting professional to assess the layout and confirm suitable electrical connections. A light that looks bright in a showroom may leave uneven shadows on a wet street.
Tips: Check access for maintenance trucks before choosing pole locations. Compare warranties, replacement parts, and cleaning needs, not just purchase prices. Keep a simple schedule for inspections.
Long-term costs include energy, repairs, and the time needed to reach each fixture. Choose durable, weather-resistant materials suited to local conditions, especially where salt, dust, or heavy rain is common. Controls that dim lights during quieter hours may reduce energy use, but test the settings on site. Drivers and residents still need clear, consistent visibility. Small details count. One thing is easy to overlook: branches grow, and light patterns change. Recheck the installation after landscaping or road work, and adjust the maintenance plan when problems appear.

